Sunday, May 25, 2008

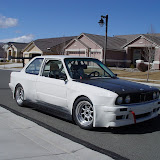
Gutting the car (again) for paint


I set a deadline for myself so that I can finally get some paint on this thing and start driving it again. I have a lot of testing to do this summer, and our summers don't seem to last very long. I removed the seats and anything else that wasn't welded in. I then applied filler in any areas that needed it and had a good full day of sanding...the electric DA I bought from Harbor Freight is doing an outstanding job, I only expected it to work for about an hour. Tinfoil works really well for masking off wires and such, it removes easily without any sticky residue.

Thursday, May 22, 2008

A few better pics of the diffuser---


The diffuser is taking shape!

The rear diffuser if finally taking shape...I've had to redesign it a few times after it started out way too big. Functionally it would've been awesome, but it looked ridiculous. Now it still looks ridiculous, just less :)


Here it is temporarily mounted for fitting. It is constructed from aluminum honeycomb composite and is pretty light for its size. The main angle of attack is also adjustable.


The tail end protrudes past the rear bumper about 1.5"---it matches the wing uprights nicely. I'll paint the whole diffuser black as soon as our weather gets better again...only 58 degrees today.

You can also see I left an open air channel above the main diffuser surface to allow as much airflow as possible...the fuel cell will block some of this flow, but it's better than having the air get turbulent behind the bumper.


Here's the support brackets I made from square stock and c-channel. I welded in all-metal lock nuts to the inside of the c-channel as mounting points.


I also made a new photo album in addition to this blog, it contains all my build photos so far-

Project E30 Photo Build Diary

Thursday, May 15, 2008

New Fuel Cell fitted


I finally purchased the correct fuel cell...I picked up a flange mount 12 gallon unit. It was a little too tall to just leave it sitting on the floor of the trunk, so I cut a hole in the floor to drop it through in an effort to lower the center of gravity. It sits about 5" below the floor and 4" above. It's a little higher than the stock tank, but I need a lot of weight in the rear so hopefully this should be a good trade off.
I used L-channel steel to distribute the weight across to the frame rails, where I will fabricate a bolt-in mechanism. I was going to weld the whole thing in, but I thought it might be nice to have the ability to remove it to service the differential or sub frame.
After the cell is completely fit, I'll have to figure out how to re-route my fuel lines and install a new pump and filter setup. I should probably do that soon, considering I put Kevlar over the old fuel door and it's going to be tough to get gas in the old tank. Whoops. Maybe I can use a transfer pump and some hose for a while.

Monday, May 12, 2008

Additional door bars added

Today I welded on some additional door bars to allow for easier entry and exit. Since the doors are now just thin carbon skins, you can't sit on the sill and swing your legs in, so I added the bars. Now you can sit on the top of the door before you drop into the seat, no worries of damaging the door skins. I also welded in the pin-plates for the quarter-turn fasteners that hold the skins in place.

I believe that the additional door bars added some significant rigidity to the car...they should help stiffen the unibody and transmit the loads carried by the cage.

Sunday, May 11, 2008

More cutting, preparation for rear diffuser


I began cleaning up the underside of the car in preparation for the rear diffuser and undertray setup...it's pretty bare underneath now! I cut off the existing muffler (which was some aftermarket setup that the previous owner had) and made some exhaust turndowns from the leftover bits to direct the exhaust away from the suspension. I had already removed the spare tire well, see a previous post.

I then cut away the bumper to allow fitting of a wide and deep diffuser...which I am fabricating now. The attachment points for the diffuser will be the frame rails, they are the only sturdy thing nearby. I also picked up my fuel cell, so now that I have the correct dimensions I can calculate the proper angle for the diffuser.

Monday, May 5, 2008

Barge Boards / Running boards fab'd

The running boards or barge boards are just about done- I was able to mock up one side and get the pieces trimmed for the other side. The purpose of the running boards is to tie in the fender flares with the rest of the body, as well as to integrate with the undertray and add more surface area to the undertray. The barge boards also act as skirts to help direct the airflow under the car to the rear diffuser.


The running boards are aluminum honeycomb composite riveted to the chassis. The barge boards are lexan plastic riveted to the aluminum. I used lexan so that if i scrape over something there is should be less damage since the lexan will flex instead of breaking.


I still have to finish sanding the micro on the fenders and then hopefully I can get some priner on this thing. I'm getting anxious to drive it now that the weather is good, I already missed the first track day of the year.


Friday, May 2, 2008

Carbon/Kevlar door skins

I completed the door skins, made from a Carbon/Kevlar composite. I used Kevlar for the inner layer to protect the driver from shards of carbon in case the doors are destroyed. I was able to do the whole layup in my driveway since we're having nice weather...although the neighbors seem to frown upon a guy in his driveway wearing a Tyvek suit and respirator.


Here are the doors after an initial trim and simply taped to the car. I haven't quite figured out how to attach the skins to the car, but I have a few ideas. I just need to make a trip to the steel shop one of these days. The doors will be fixed (non-opening) so you'll have to climb in through the windows, but I don't think it's going to be a big problem. The skins only weigh about 6 or 8 ounces, compared to about 45lbs each for the complete doors.